
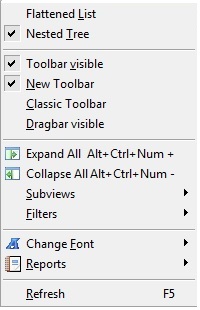
The View Menu controls the available display options. You can switch between how your entries are shown: either as a single list (Flattened List) or organized by category (Nested Tree). You can choose whether or not to display a toolbar, and if so, whether to use the 'Classic' or 'New' toolbar icons. The toolbar itself is also customizable. You can also expand or collapse all the groups displayed in the Nested Tree view, display subsets of the entries, filter the entries displayed to match any criteria, select the font in which the entries are displayed and display reports of merge, compare, import and other advanced operations.
To display or hide the toolbar, check or uncheck the Toolbar Visible menu item.
To use "new" or "classic" toolbar icons, select the "New toolbar" or
"Classic toolbar" menu item, respectively.
The "Dragbar" is a special toolbar that allows you to paste
parts of the currently selected entry by "dragging" the icon specifying
the part you want to paste to where you want it to be pasted
to. For example, to paste the "Notes" text of a given entry to another
application using the Dragbar, select the entry, and then drag the "N"
icon from the Dragbar to the application. When you release the left
mouse button, the contents of the Notes field will be pasted to the
application. The Dragbar will disable ("grey out") icons for fields that
are empty in the selected entry.
The 'AutoType' Dragbar button behaves in a slightly different
manner: Dragging it to an input area on another Window
(e.g. Browser) will cause Password Safe to begin AutoType from there.
Notes:
Expands all groups, making all entries visible (Nested Tree view only).
Collapses all groups (Nested Tree view only).
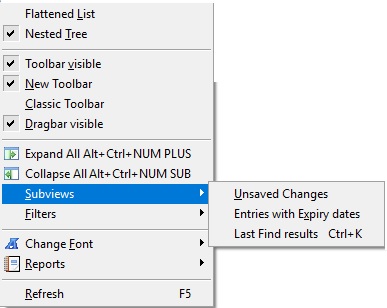
"Subviews" are predefined filters that when selected, show only the entries that match their criteria.
As all filters, they can be cleared by double-clicking the red and white striped "filter active" indicator at the bottom right of the Status Bar, as can be seen in the following images where the filter is active.
If item Save database immediately after Edit or Add in menu Manage → Options → Backups is unchecked, changed item will not be saved immediately, but they will be shown in a different colour. See the next picture:
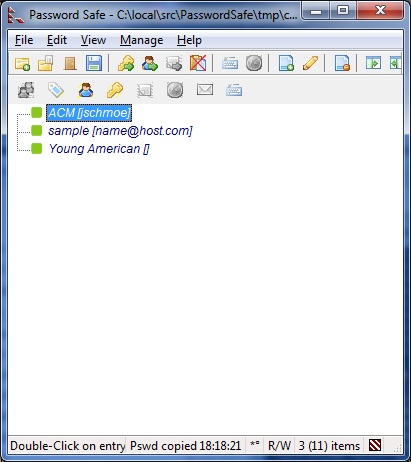
Overview of all entries:
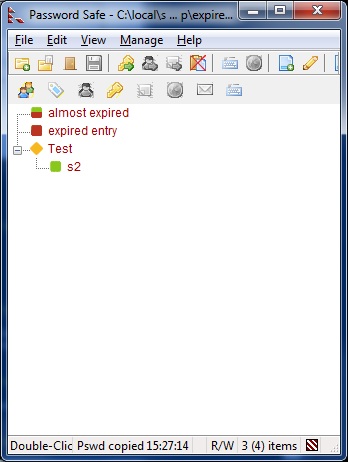
By checking this item, only changed and unsaved items will be shown. If this filter is active and you save your database changes, it will be cancelled and the full database will be displayed.
Overview of all changed entries:
Note: As long as there are some unsaved items, there will be a "*" in the status area at the bottom of the application's window.
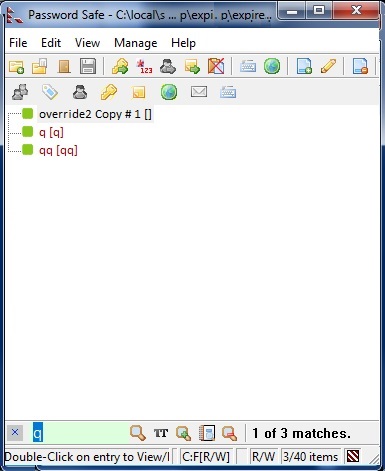
If you select this menu item, only entries with a defined expiry date will be shown in the list. It does not matter that the expiry date is in the past or future.
If there aren't any entries with expiry date, this menu item will be grayed out.
If you select this menu item, only entries that were found during the last Find operation will be shown. If a Find hadn't been performed or it had been cleared, then this menu item will be grayed out. If the Find Toolbar was visible when this filter was activated, it will be closed, since no new Finds can be performed whilst this filter is active. Find Next (F3) and Find Previous (Shift-F3) will still be available.
Note: If this filter is active, as it is based on displaying entries in the database
found during the last Find operation and only these, i.e. the Find operation
is not redone should the database be changed. For example:
A "filter" is a criteria (or set of criteria) that an entry either matches or doesn't match. Password Safe allows you to define filters and display only those entries that match a given filter. For more information on defining and using filters, see here.
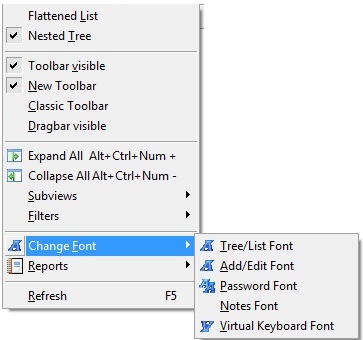
Select a different font for displaying entries in the List or Tree views, and for displaying passwords in the Add and Edit Entry dialog boxes. You can also specify the font to use in the Virtual Keyboard. Note that this font must be able to display Unicode characters. Supported fonts include: "Arial Unicode MS" (which comes with Microsoft's Office suite), "Arial Unicode" and "Lucida Sans Unicode", although you may select another using the appropriate menu item.
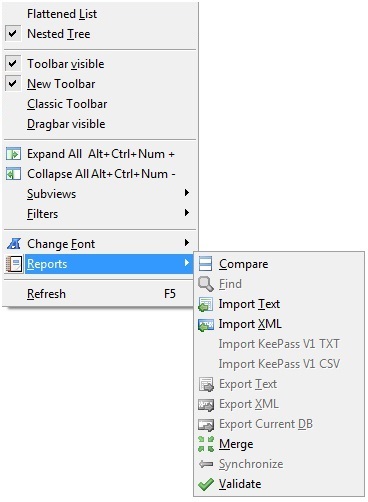
If you save the results of Compare, Export, Find, Import, Merge, Synchronize and Validate operations to disk, they are stored in the same directory as the database. If you repeat one of these operations and again save the report to disk, it will overwrite any previous report for this operation without requesting permission. You may view these reports at a later date when you open a database in this same directory.
Refreshes the display either by pressing the F5 key or clicking on this menu item.